How to dimension distances in technical drawings
Adding dimensions to technical drawings is really easy with PDF Annotator.
If you frequently work with technical drawings, PDF Annotator can be really helpful by providing the tools to dimension distances and areas in PDF documents.
In this tutorial, we want to look at adding dimensions for distances.
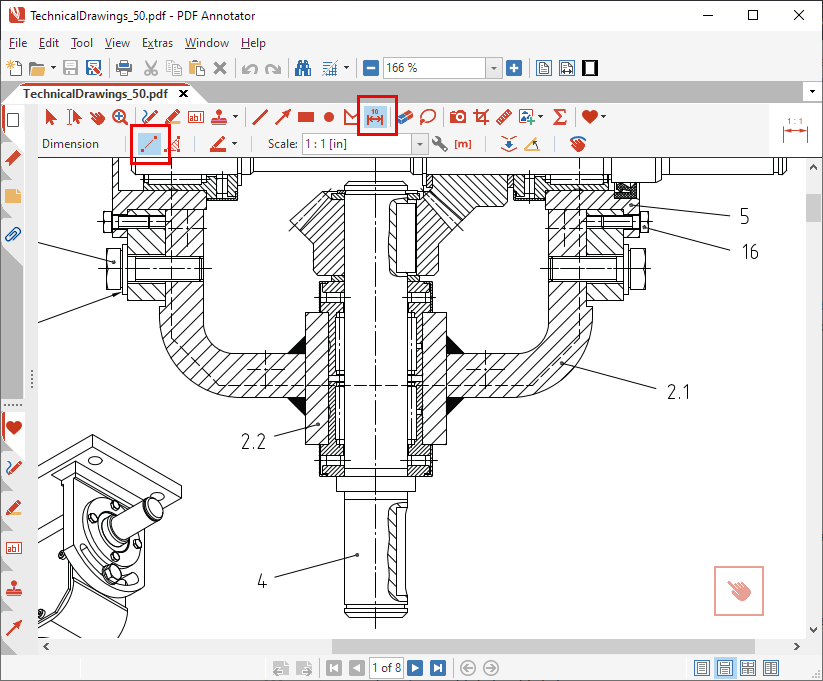
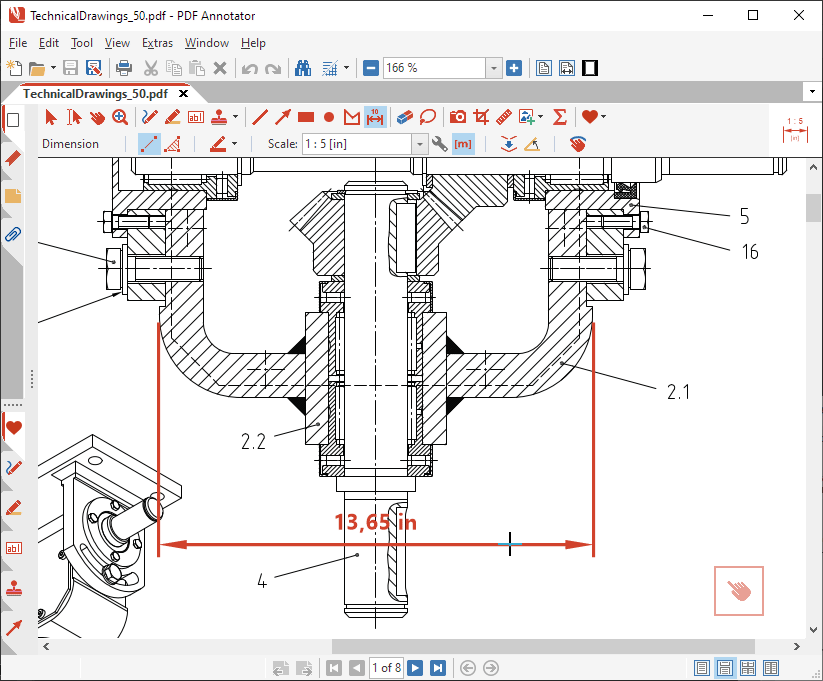
Let's have a look at this example. The technical drawing shows a sectional view of a small gear box.
To activate the Dimension Tools, we click the Dimension tool icon on the toolbar above the document.
To make sure we dimension distances, we click the Dimension Distance icon in the toolbar below.
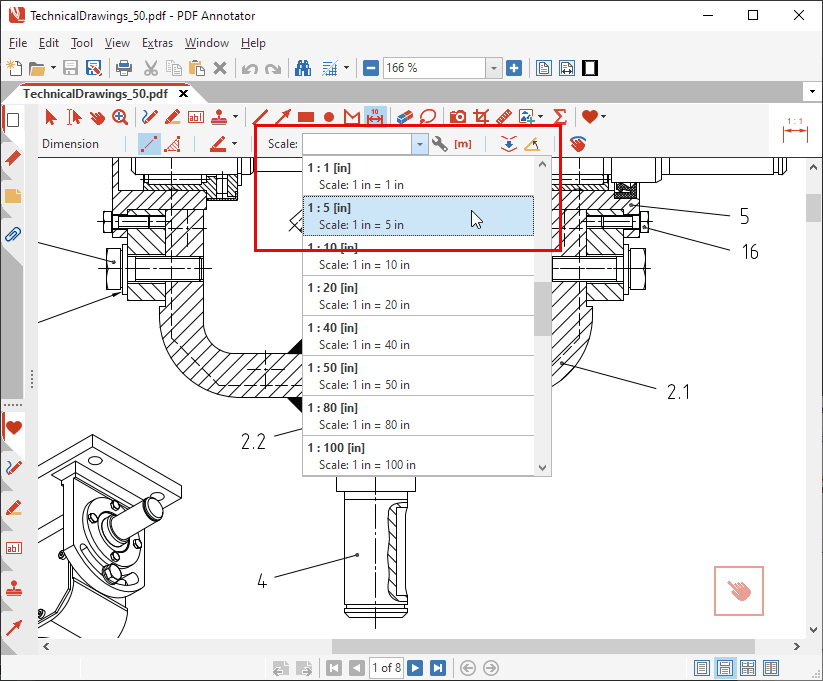
From the drawing's title block, we know that this drawing is in 1 : 5 scale.
So we head to the Scale dropdown list in the toolbar, and select the 1 : 5 scale.
We select 1 : 5 [in], as we want to measure in inches.
Note: For a metrical drawing, we could have scrolled down the list for 1 : 5 [mm].
Now, we want to dimension the diameter of the gear box case.
So we click the left side of the case to start the dimension and drag the cursor over to the right side while keeping the mouse button pressed.
While we drag the mouse over, we can already see the dimension and the measured value.
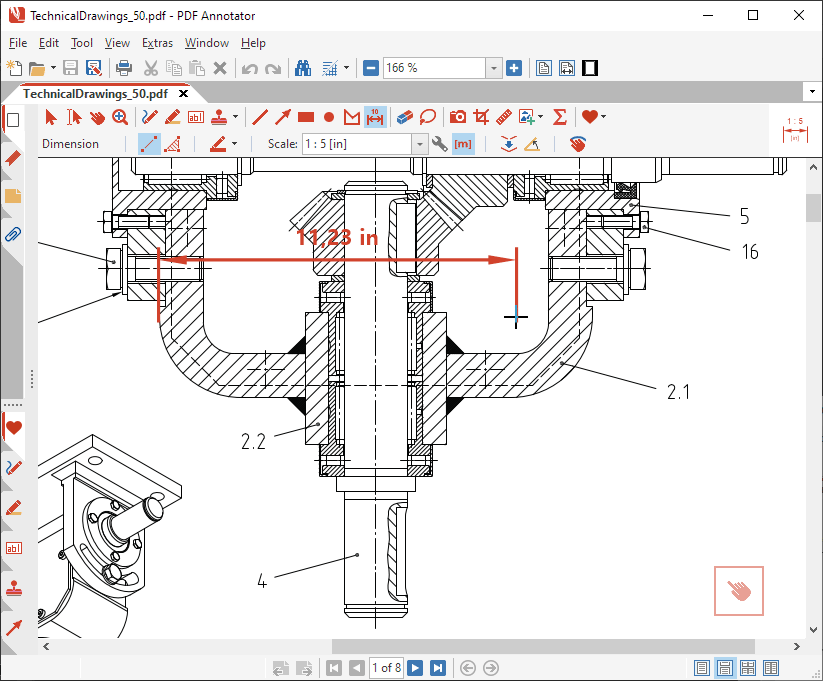
Once we release the mouse button, we have defined the end point of the dimension.
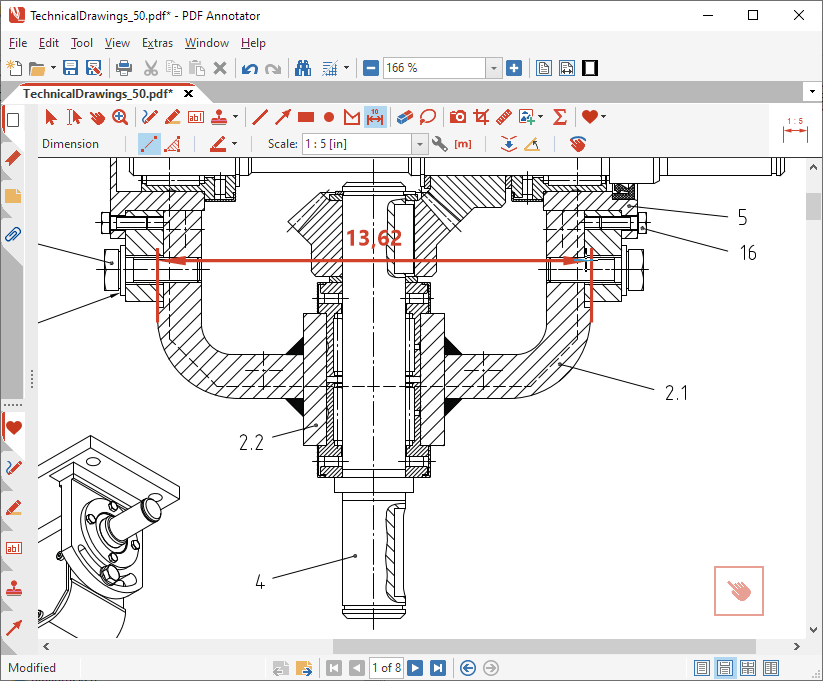
Now we need to position the dimension line. So we move the mouse down a little bit. One more click and the dimension line has been positioned.
Hint: There are two ways to dimension a distance. Either you hold the mouse button down while dragging, and end measuring by releasing it (mouse down - drag - mouse up), or you first click the starting point, then move to the end point, and click again (click - drag - click). Try both methods, and use whichever you prefer!
By the way: If you have already positioned the dimension's end point, but want to correct this, just press the ⟵ key and start over positioning the point!
That's it! As you've seen, with PDF Annotator's help, dimensioning distances is really easy!
Note: Dimensions are annotations that get saved with the PDF document just like any other annotation you create in PDF Annotator. If you only want to quickly measure something in a technical drawing, but not create a permanent dimension, use the Measure tool instead.
Now, let's have a look at some advanced dimensioning features.
Overriding the dimension text
Sometimes it is necessary to change the metric measured by PDF Annotator. With the mouse, for example sometimes it's not so easy to set the start and end points exactly. Then you get "crooked" values like 13.99, but it is obvious that the correct value is 14.0.
Just double-click on the dimension. This will open the Edit style properties dialog. There you can edit the contents of the Dimension Text field.
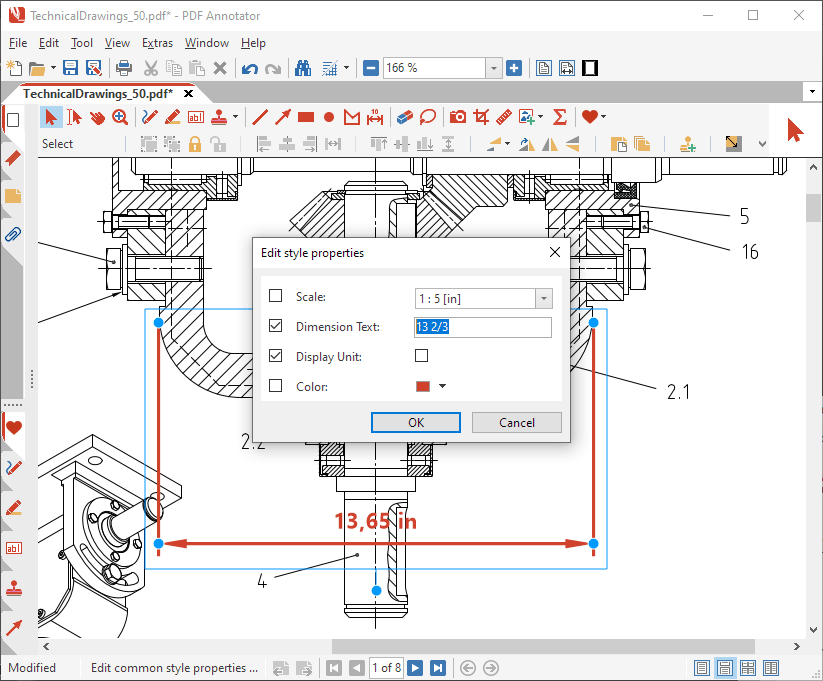
In the Edit style properties dialog, you can also set other properties, like Display Unit or the dimension Color.
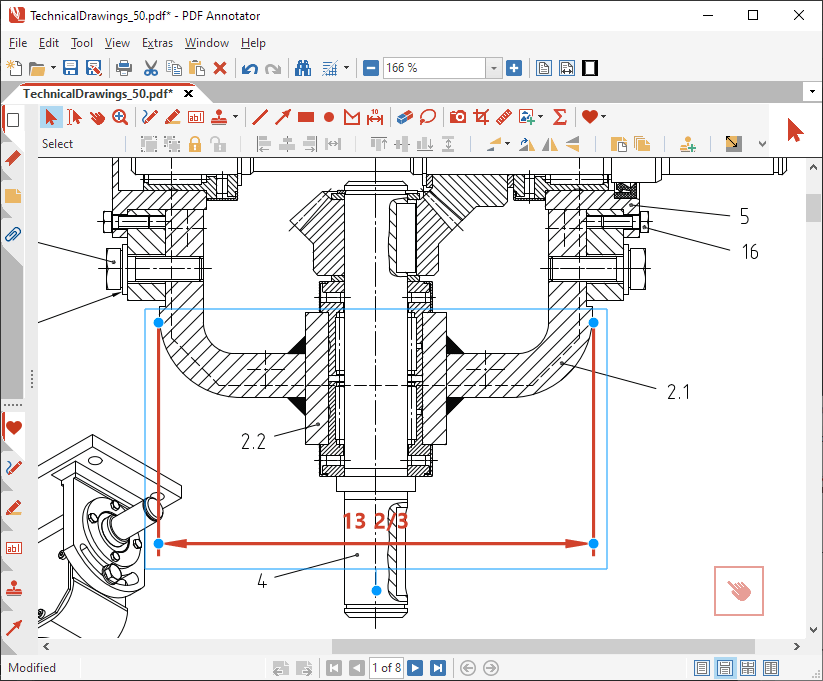
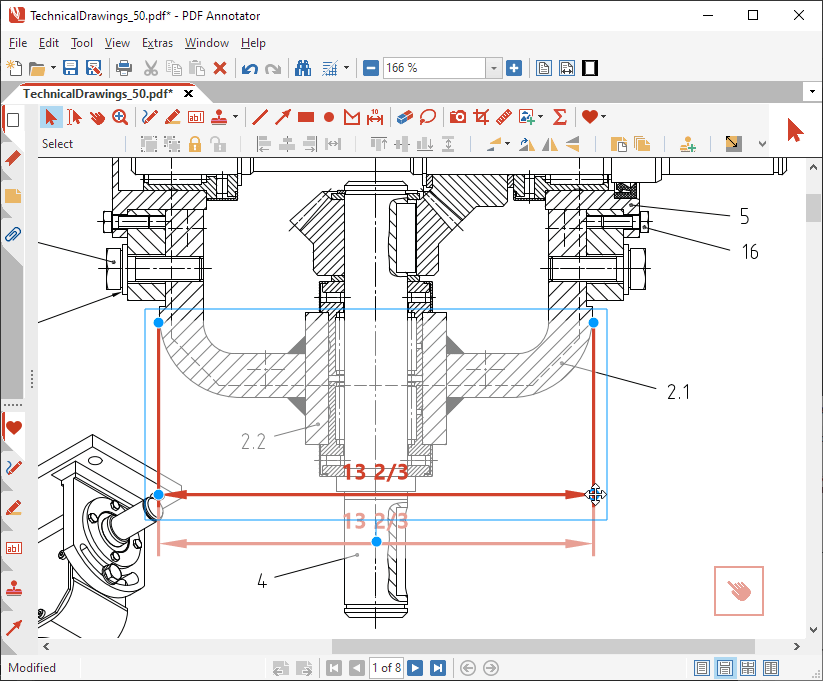
Moving start and end points, repositioning the dimension line
When the dimension has been selected (use the Select tool to select a dimension), you can simply move the start and end points, as well as the position of the dimension line by moving the blue dots around.
Horizontal/Vertical Dimensions
In many cases, we want to draw dimensions either exactly horizontally, or exactly vertically.
To get help with that, it can make sense to enable the Snap line to 15° angles option for the Dimension tool.
Try to enable this option and place a new dimension.
You will see that the tool automatically snaps to horizontal or vertical angles, or any 15° steps in between.
Just click the Snap line to 15° angles option one more time to toggle it off again. You can turn this option on and off as you need it. When you notice that the Dimension tool snaps in steps of 15°, and that is not what you need, just disable the option.
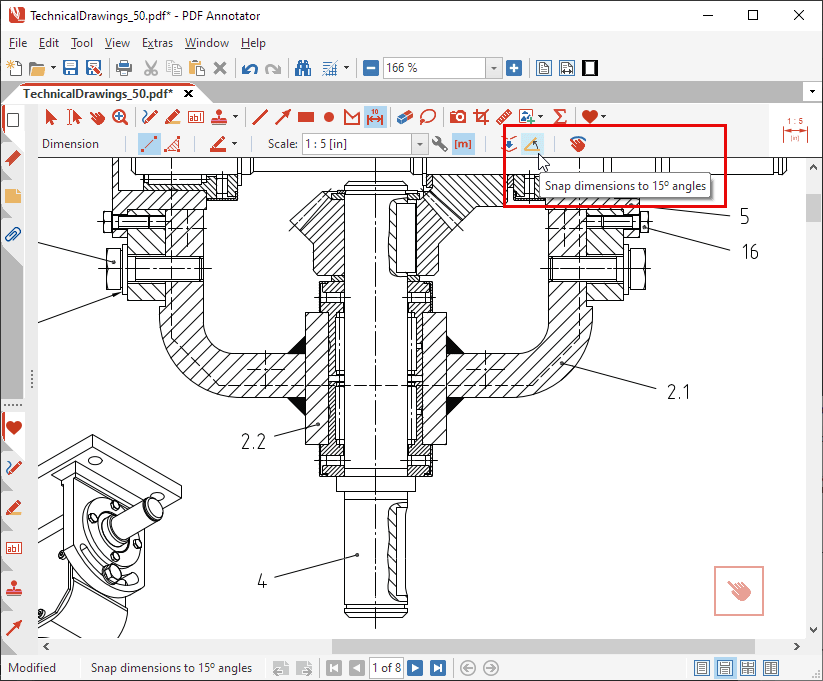
Hint: If you only want to use the Snap line to 15° angles option on a case by case basis, when using the mouse down - drag - mouse up method (see above), just press the SHIFT key while dragging.
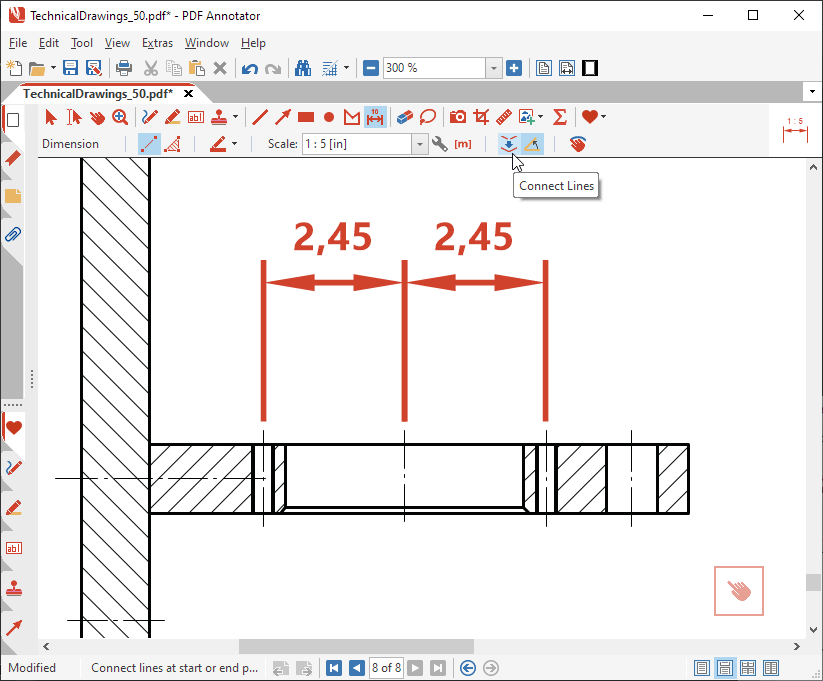
Dimensional chains / Connecting lines
Another interesting feature is the Connect Lines option.
If Connect Lines is active, PDF Annotator "catches" existing start and end points of PDF Annotator created annotations when selecting the points of a new dimension. Usually you will use other dimensions you already created using PDF Annotator. (Other points, e.g. crossing points from the original PDF, the technical drawing, are not considered.)
This way, you can create dimension chains with just a few clicks and place the dimension lines very efficiently.
Just try out Connect Lines. Click the Connect Lines option to enable or disable the feature.
By the way: PDF Annotator can even help you, if your drawing's scale is not in the Scale list! Just read the tutorial Dimensioning distances with custom scales.