How to dimension areas in technical drawings
Dimensioning areas in PDF documents is really easy.
If you frequently work with technical drawings, PDF Annotator can be really helpful by providing a set of tools to dimension distances and areas in PDF documents.
In another tutorial, we showed how to dimension distances in technical drawings.
In this tutorial, we want to look at dimensioning areas.
Let's have a look at this example. It's our new apartment's floor plan. We want to find out how many square feet of carpet we need to buy for our new combined eating and living room. And we want the floor space being marked in the PDF document, so we can just send the plan over to the carpet guy.
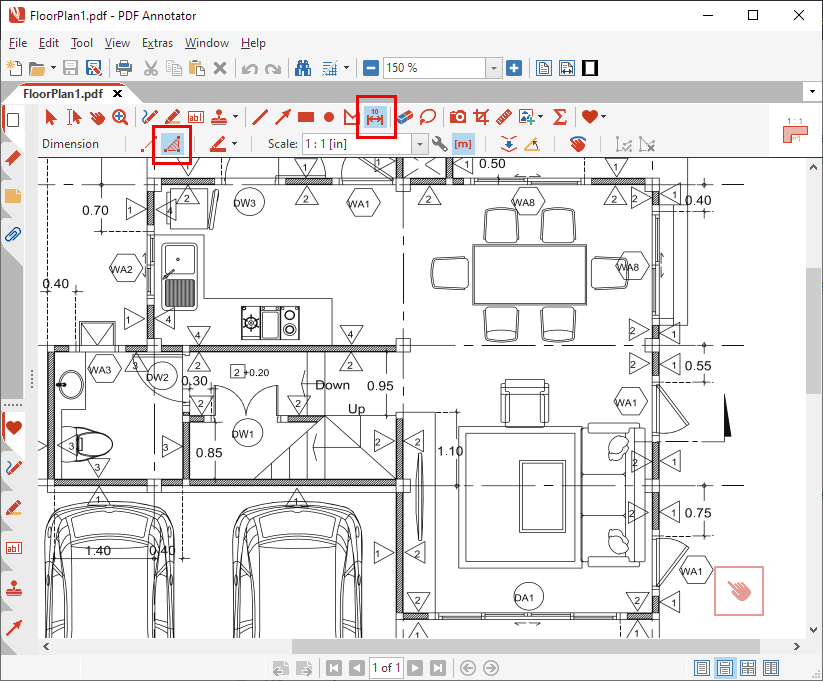
So, firstly, we need to activate the Dimension tools by clicking the Dimension icon on the toolbar above our document.
To dimension areas, we need to click the Area button on the toolbar below.
From the drawing's title block, we know that this drawing is in 1 : 80 scale.
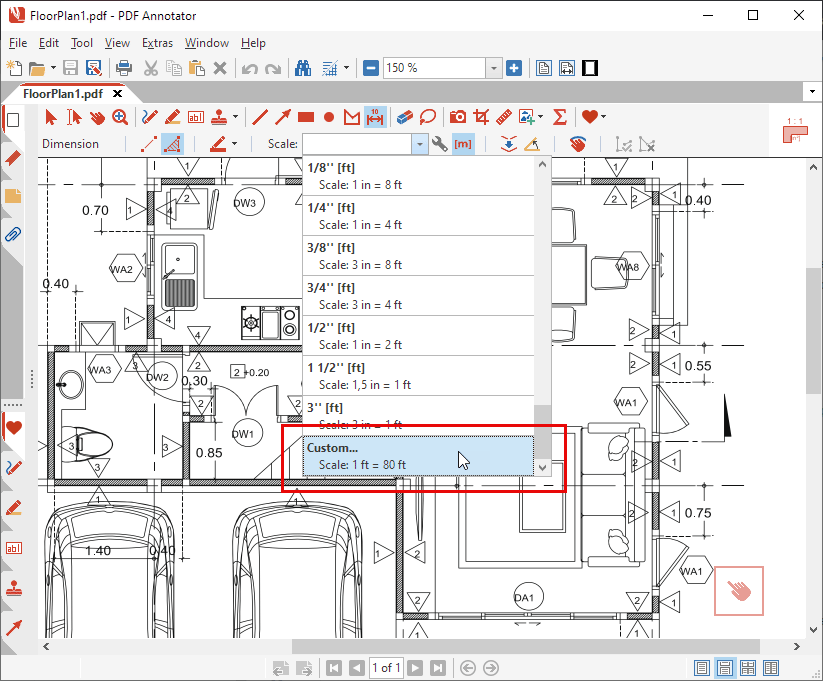
We open the Scale menu on the toolbar, but we find out that 1 : 80 is not available from this list. But no problem!
We simply select Custom... (the last entry in the list).
Now we enter that 1 foot on paper equals 80 feet in reality. In both dropdown lists we select the ft unit, as we want to measure our area in square feet.
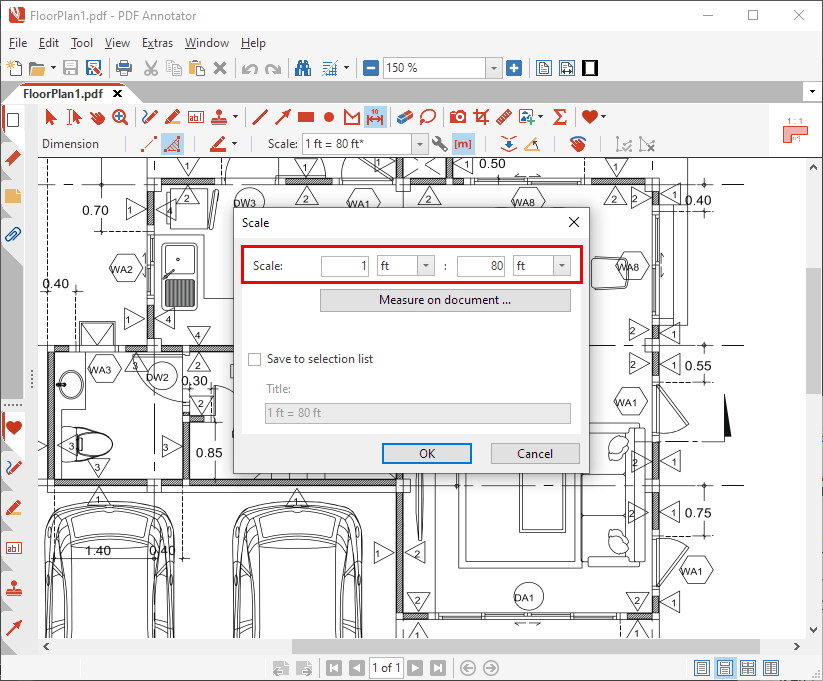
One more click on OK, and we can start dimensioning.
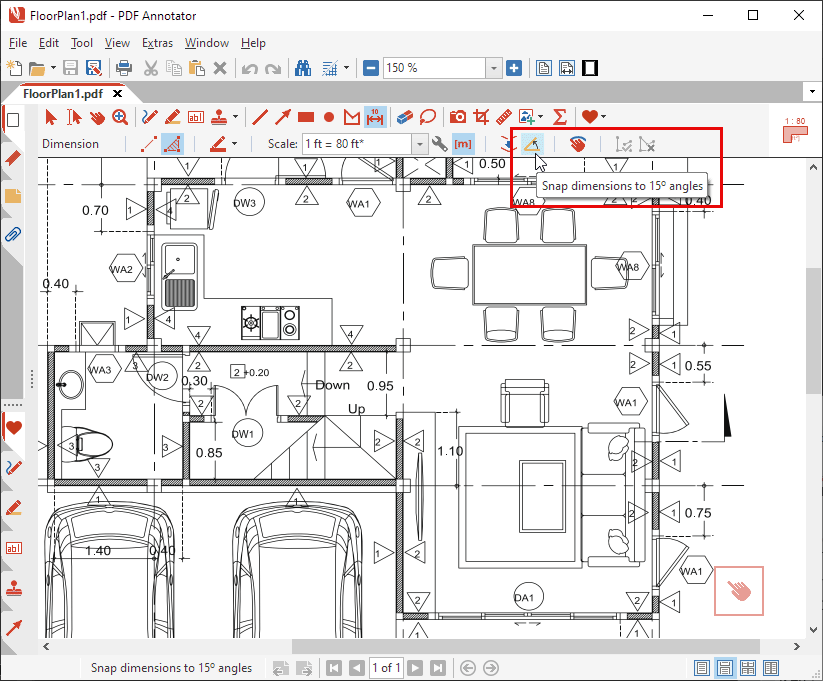
But before we start, we want to enable the Snap line to 15° angles option. This setting will help us when we dimension, because all the lines on our floor plan are either horizontal, or vertical.
Now, let's really begin to dimension our floor.
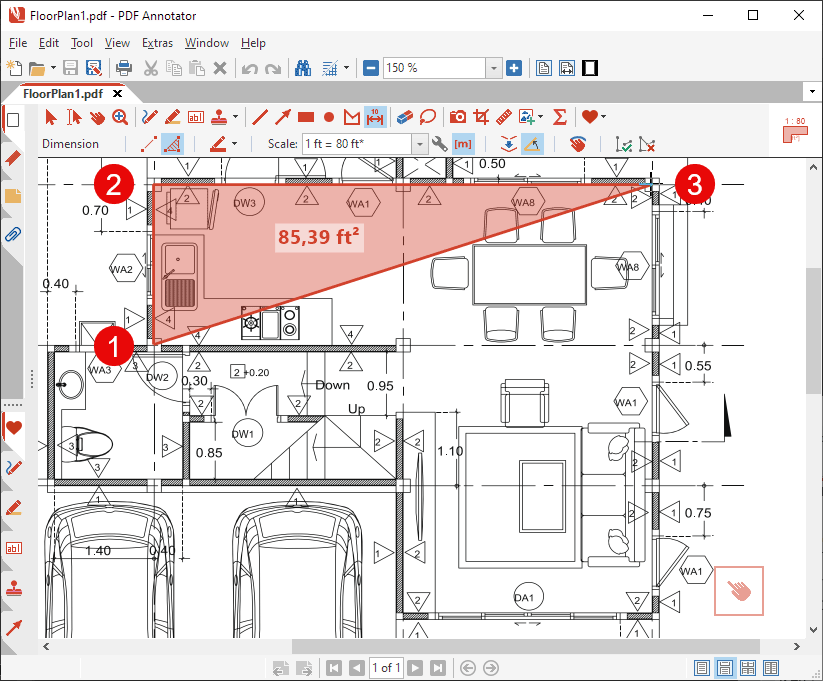
Step by step, we click the corners of the floor area we want to dimension.
Red lines show us the area we already have marked.
In the center of the area, we can constantly see the area we are measuring in square feet.
After the last corner point, we don't need to click our starting point anymore. Instead, we press the ESC key (or we perform a right click with the mouse). This ends the measure process.
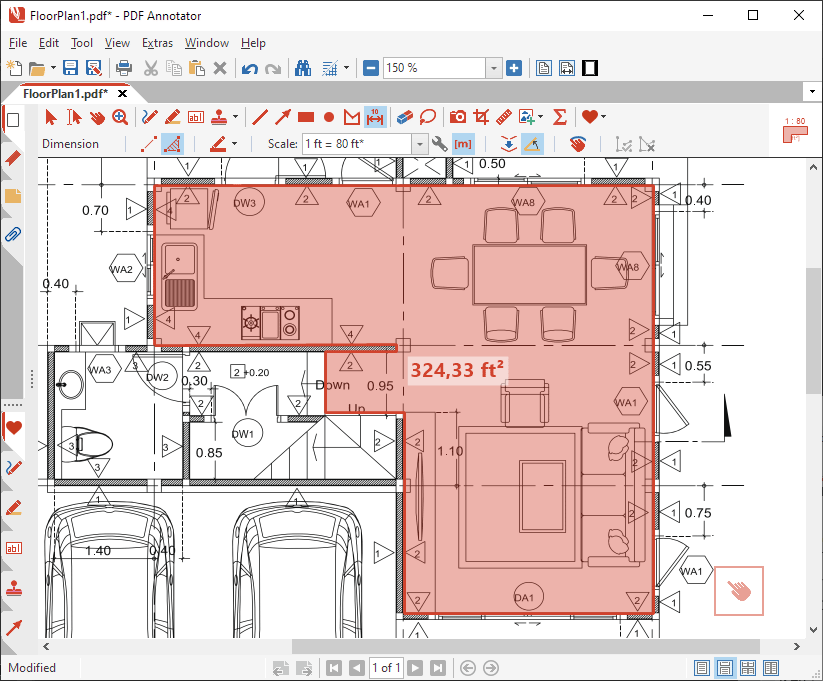
That's it! As you've seen, with PDF Annotator's help, dimensioning areas in PDF drawings is really easy! Now, all we need to do is to find the right carpet for our 320 ft² floor. And move in.
Note: Dimensions are annotations that get saved with the PDF document just like any other annotation you create in PDF Annotator. If you only want to quickly measure something in a technical drawing, but not create a permanent dimension, use the Measure tool instead.
Now, let's have a look at some advanced dimensioning features.
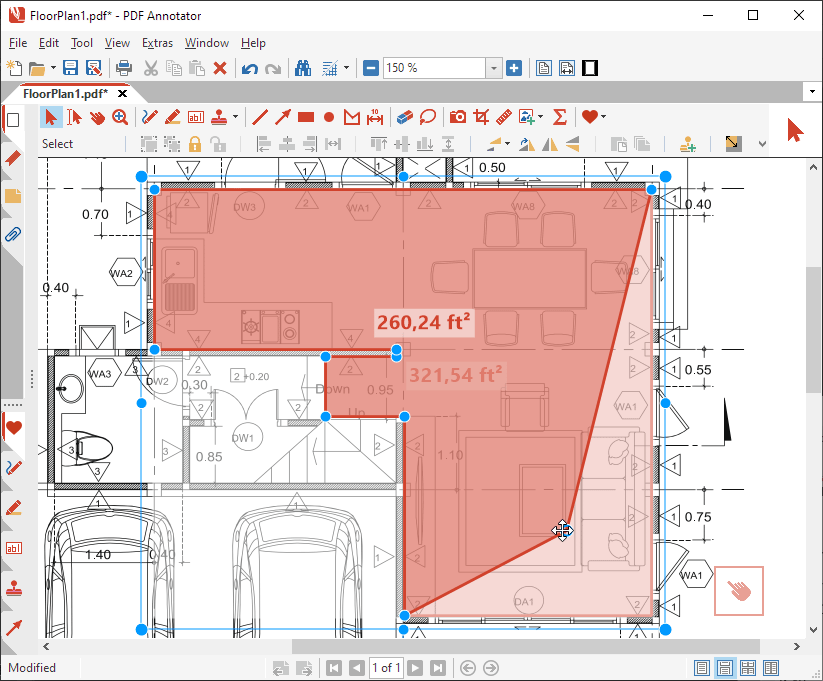
Moving points
When the dimension has been selected (use the Select tool to select a dimension), you can simply move the start and end points, as well as the position of the dimension line by moving the blue dots around.
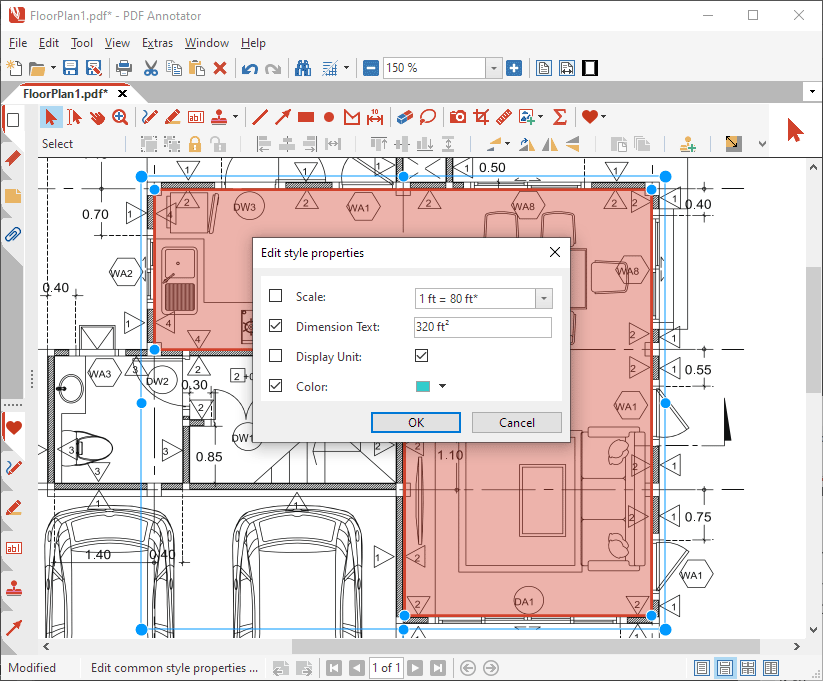
Overriding the dimension text
Sometimes it is necessary to change the metric measured by PDF Annotator. With the mouse, for example sometimes it's not so easy to set the points exactly. Then you get "crooked" values like 13.99, but it is obvious that the correct value is 14.0.
Just double-click on the dimension. This will open the Edit style properties dialog. There you can edit the contents of the Dimension Text field.
In the Edit style properties dialog, you can also set other properties, like Display Unit or the dimension Color.