How to create a date stamp
You can create your own date stamps in PDF Annotator!
When you browse the Stamps toolbox, you will see that PDF Annotator comes with a number of predefined date stamps. Those stamps automatically insert the current date when placed on a document. If you need your own variation of a date stamp, for example with your own text part, you can create one! This is not an officially documented feature in PDF Annotator, but we'll show you how it works.
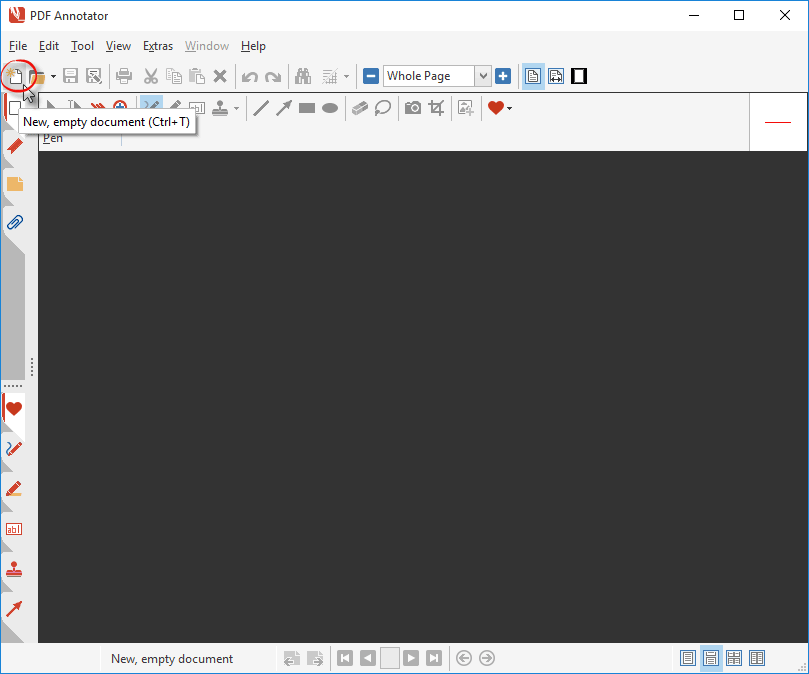
First, we click the File, New command, so we have a blank new document, which we'll need as a scratchpad.
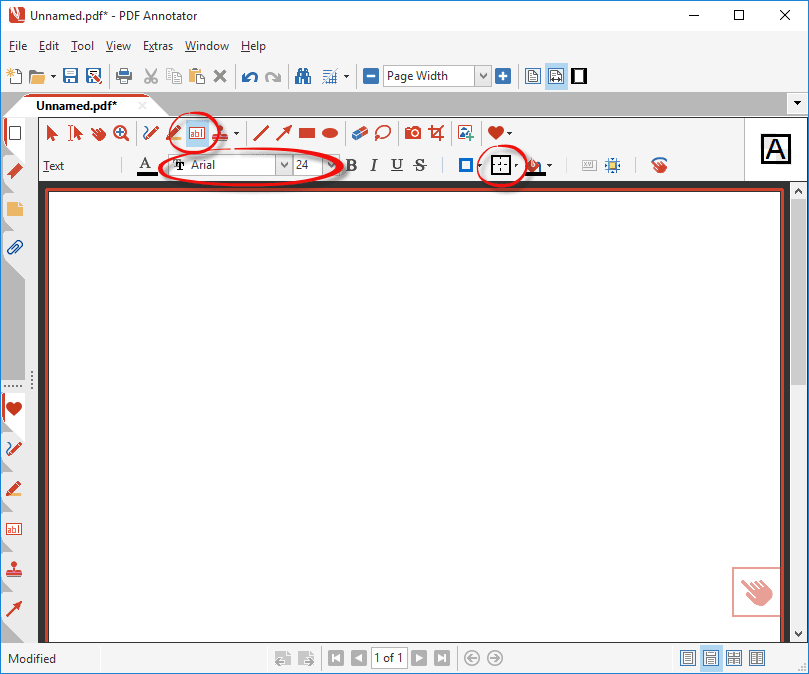
Next, we select the Text tool and set its Properties the way we like our stamp to look. For example, we choose a font size of 24, and a thick border.
Now we click into our document to place a new text box. It doesn't matter where we place that stamp on the document.
We enter the custom text we want to include in our date stamp.
In the place where we later want the current date to appear, we enter this magic text: %DATE%.
Finally we increase the width of the text box (by pulling the middle handle on the right), so that the date will fit into the box when the magic placeholder will be expanded to the current date.
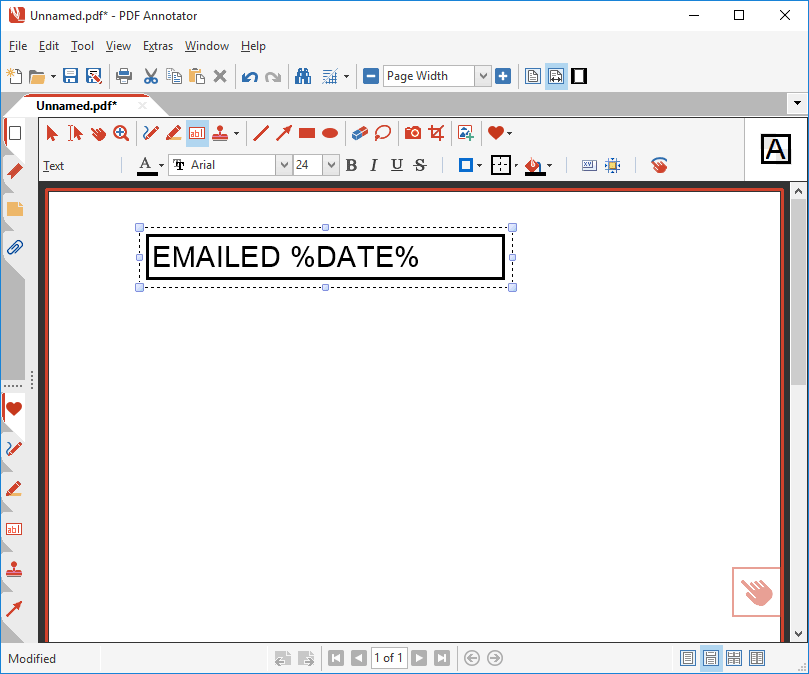
By pressing the ESC key, we exit the text editor.
We now switch to the Select tool, click onto the newly created text box, and right click again onto it to pull up the context menu.
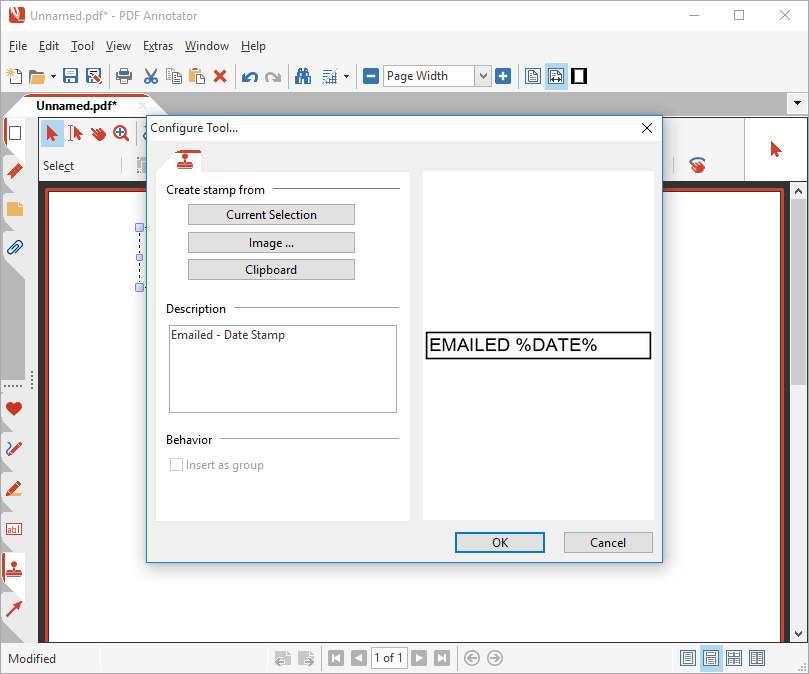
On the menu, we select Selection, Save Selection as Stamp.
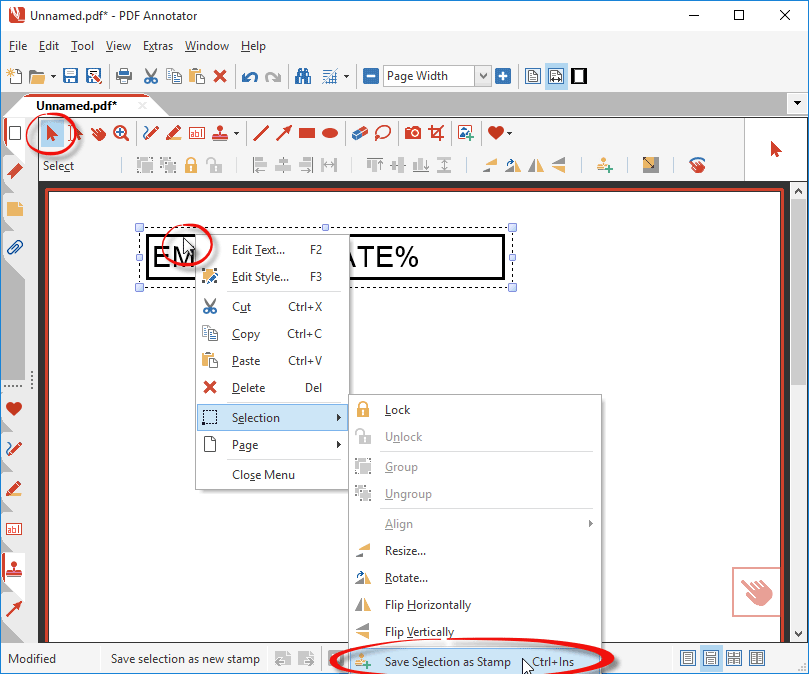
The Configure Tool window comes up, where we can enter a Description to identify the stamp later on. The description appears when you hover over stamps in the Stamp toolbox.
After clicking OK, the stamp will now be available on the Stamp toolbox.
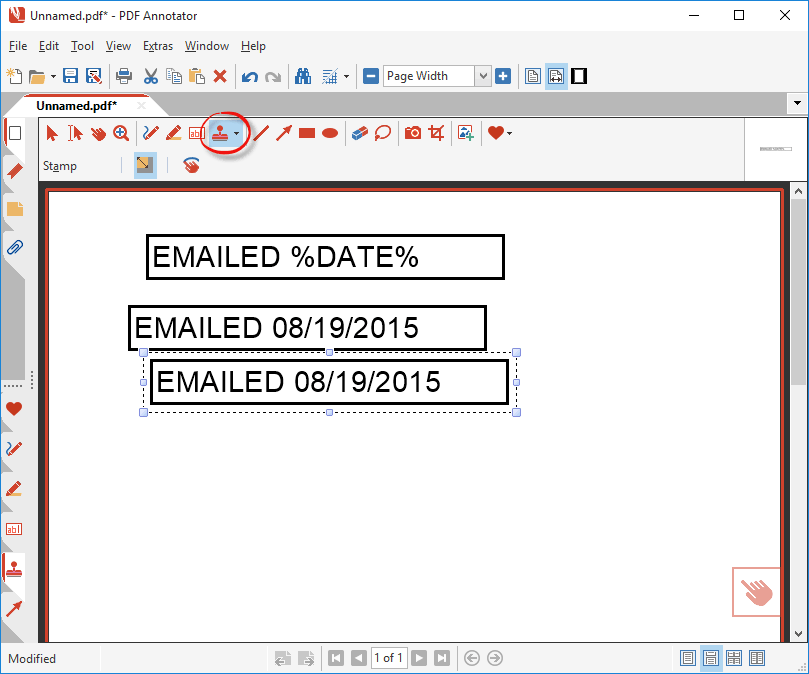
We can now switch to the Stamp tool and try out the new stamp by clicking into our document.
As you see, the magic placeholder we inserted, will automatically be expanded to the current date.
The stamp we created will stay available in the Stamp toolbox even after closing and restarting PDF Annotator.