The Tool Sidebar
 In this article, we will be taking a closer look at the tool sidebar and discover how it works. You will find
this feature to be a real time-saver.
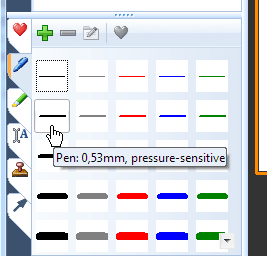
PDF Annotator comes with a bucket full of tools to enhance your annotation tasks. The Toolbox is located on the left side of the workspace. If it is collapsed, clicking on one of the tool tabs will open it, showing the various tools for that tab.
When the toolbox is open, passing your cursor over the tools will show the preset properties of each tool. Clicking
on one will select the tool for use.
Notice how the tool shows up on the bar above your document. From there you can edit the tool or use the preset
properties. In this screenshot, I selected the auto-smooth feature for freehand inking. You can change other
attributes as well. Think of the preset tool properties as a starting point.

Select a different toolbox and tool will change the working bar above your document to the attributes of the tool
selected. Use the defaults or modify to your needs.

You might notice that the preview icon at the right side of the screen changes to match the current tool and
its attributes. This is designed to show what tool is selected with a quick glance.

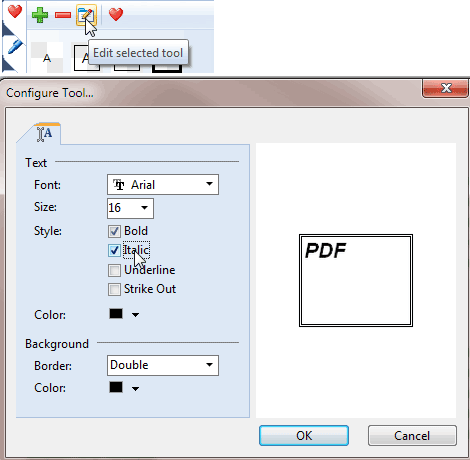
While we are on the subject of attribute modification, you can modify the tool directly in the toolbox.
Select a tool, then click on the Edit selected tool button at the top of the toolbar. You will get a pop up
dialog box, from which you can configure the tool. As you select, deselect or change attributes, you will see the
modifications in real time in the window. Once you are finished, the modified tool is ready for use.

Finally, I want to call your attention to my favorite button on the toolbox. Do you see the little red heart at the top of the toolbox? That button has a very special purpose and one that I think you will use as much as I. And that purpose ... will be discussed in the next article!