Changing a Predefined Tool Style
The toolbox in the PDF Annotator sidebar shows you a wide range of predefined tools. When you click on a pen, marker or text tool choice, the toolbar above your document changes to the chosen tool properties.
You can then change the properties for that tool by selecting them in the toolbar. This will not affect the predefined tool in the toolbox, though. The next time you select the predefined tool in the toolbox, the same predefined settings will be applied. However, you can permanently edit those predefined tool settings in the toolbox.
There are separate toolboxes for each tool type (Pen, Marker, Text, Stamp, Graphical Object), plus the Favorites toolbox. Properties can be changed in each individual toolbox. Additionally, changes made in the Favorites toolbox are reflected in the Favorites toolbar. We'll come back to that later.
Let's see how changing a predefined tool's properties works.
Editing a Predefined Tool
For this example, we will use the Favorites toolbox.
First, open PDF Annotator. There's no need to open a document to work on the tools in the toolbox.
To open the Favorites toolbox, click the tab with the heart icon in the sidebar on the left.
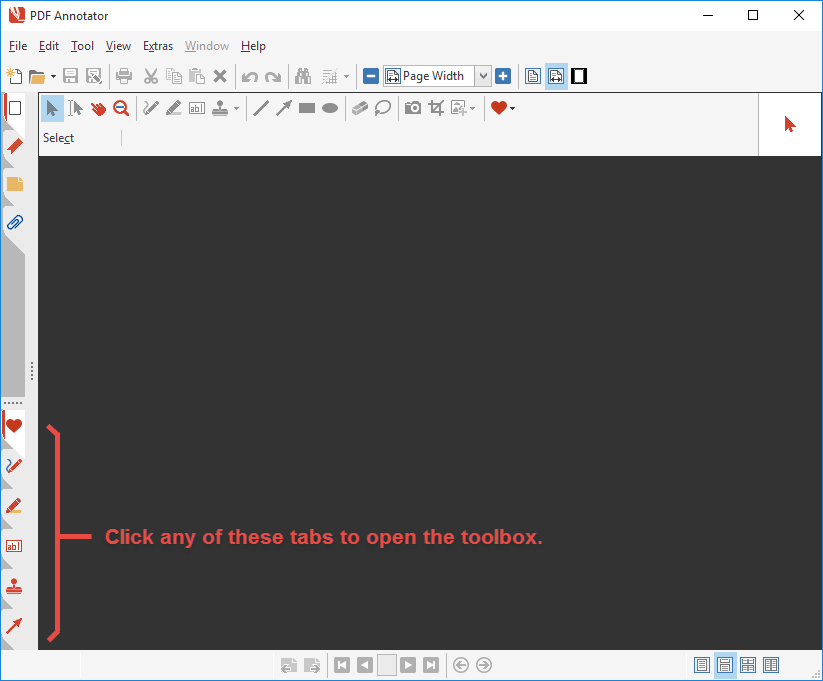
The sidebar expands and displays the Toolbox in its bottom half.
Choose a tool by clicking on it.
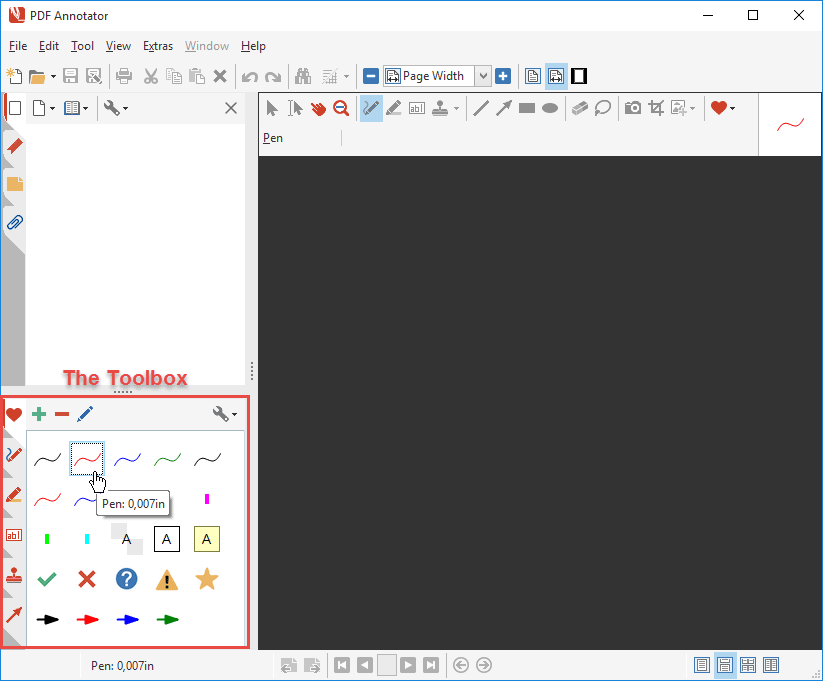
Now click the Edit tool button at the top of the toolbox.
This opens the Configure Tool dialog box.
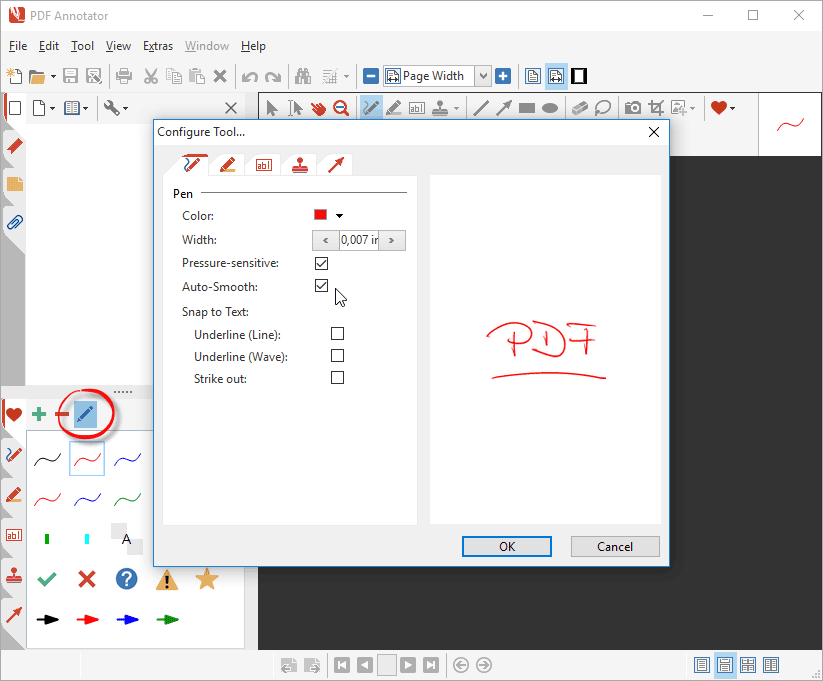
The Configure Tool dialog box allows you to change the properties for that tool.
Color, Width, Pressure sensitivity, Auto-Smooth as well as the Snap to Text options are properties available for pens and markers. Different tool types offer different sets of properties.
Choose the desired options and click OK.
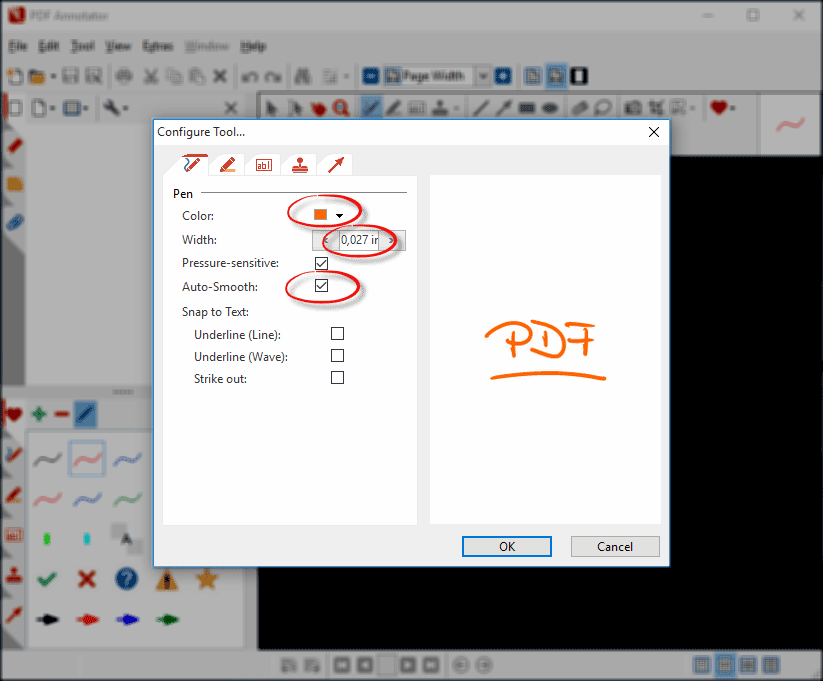
In the example, we switched the pen Color from red to orange, increased its Width and activated Auto-Smooth. The toolbox reflects our changes.
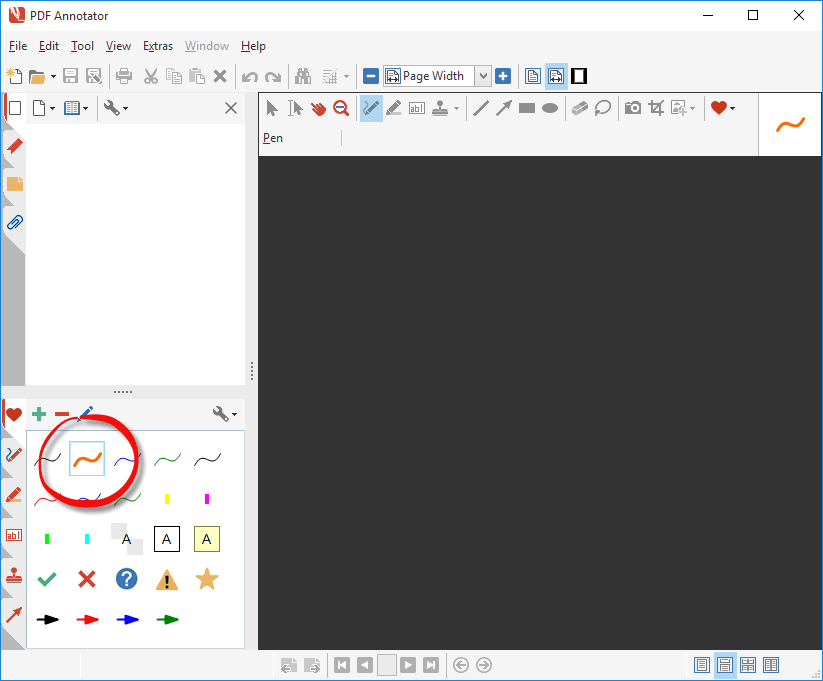
Favorites Toolbox and Favorites Toolbar
As previously mentioned, changes made to tools in the Favorites toolbox are mirrored in the Favorites toolbar.
If the toolbar isn't showing, you can activate it by selecting View, Toolbars, Favorite Tools on the menu.
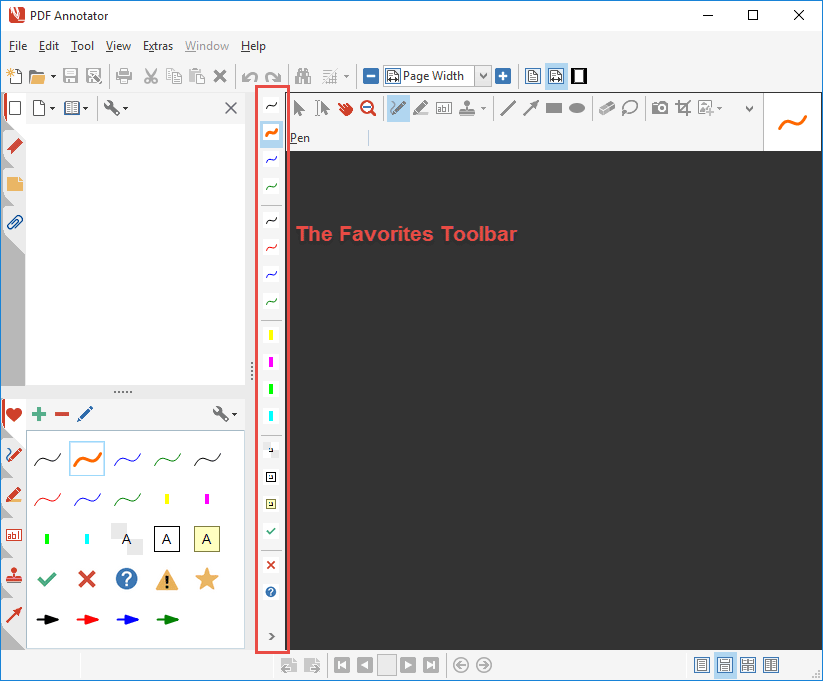
As you can see, the Favorites toolbar displays exactly the first 24 tools defined in the Favorites toolbox.
When you edit a tool in the toolbox, it will automatically update in the toolbar as well.
Resetting a Toolbox
Finally, it is easy to reset the tools to their original settings.
Choose a toolbox and then click on the toolbox options icon at the top right corner of the toolbox.
On the menu that opens, choose the Reset option for that toolbox.
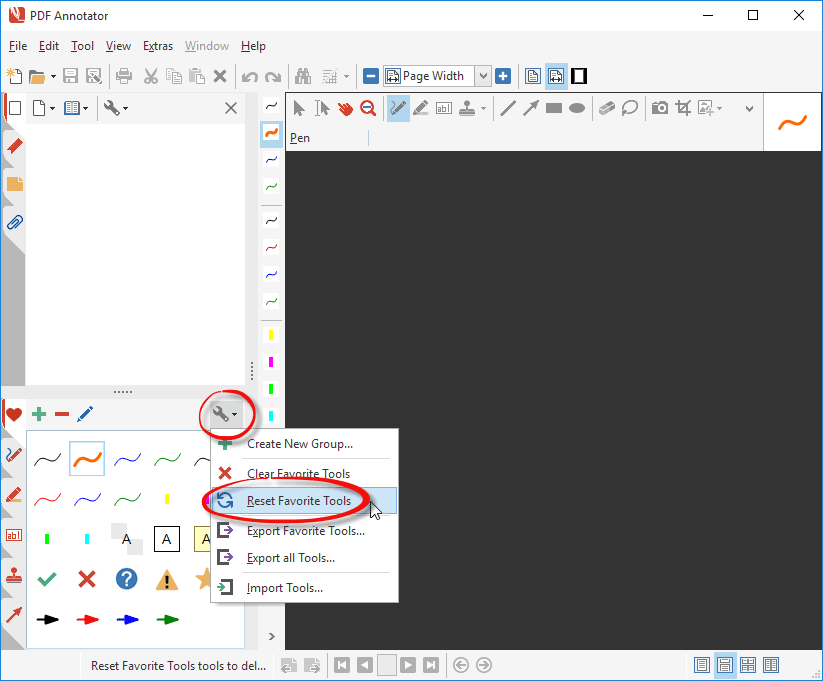
Click OK on the confirmation dialog box and it will be reset to its delivery state.
Keep in mind that resetting a toolbox will also erase any tools you previously added to the toolbox.
Tip: Move or Undock the Favorites Toolbar
The Favorites toolbar can be undocked and dragged to another location on the screen.
If you want to learn how this works, please read our short step-by-step guide: How to move or undock the Favorites toolbar.
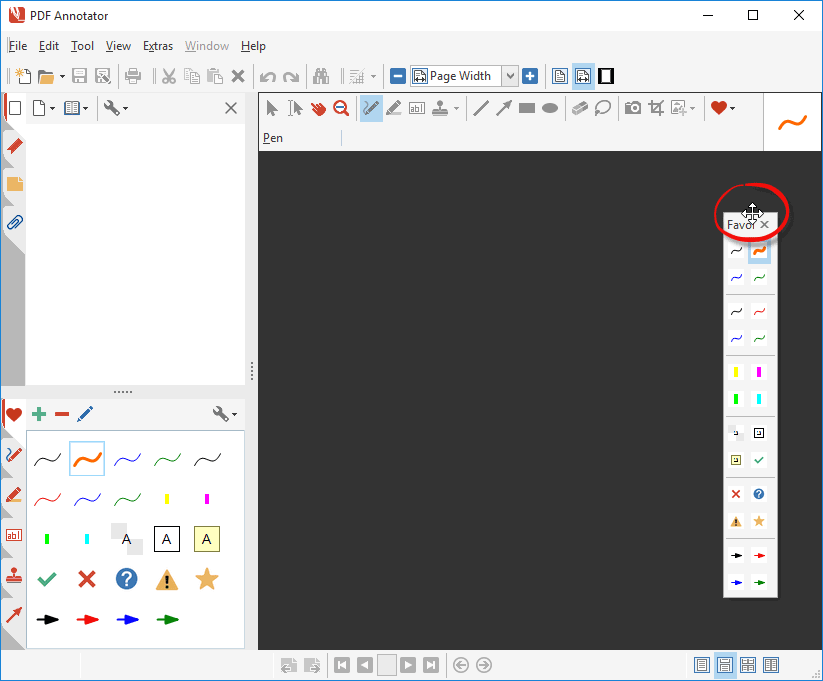
Also, you can always reset your toolbars to their delivery states as well. Just click View, Toolbars, Reset All Toolbars. Again, keep in mind that this will also reset any customization you made to the toolbars. It will not affect your toolbox, though.