Editing Style Properties in Non-text Annotations
We covered editing of multiple text annotation styles in a previous article. In this issue, we will be showing you how to edit the properties of other types of annotations and how mixing types affects the options available.
Different Tools Have Different Style Properties
You can edit the styles of a non-text annotation (often called a markup) just like the styles of a text annotation, for example by selecting it, and pressing F3. See Editing Style Properties in Text Annotations for more options to select and edit style properties.
Each type of annotation or markup will have a different set of style properties that can be changed.
For example, the arrow tool properties are the color, the line width, the line style and the arrow tail and arrow head.
The line tool, on the other hand, only has the color, line width and line Style properties.
When you click on a tool in the toolbar, you will see the style properties available in the options bar underneath. There, you can set the properties for new annotations. But all properties can also be changed for annotations already created.
When you select an annotation and invoke the Edit style properties dialog (for example by pressing the F3 key), you will see the same list of style properties.
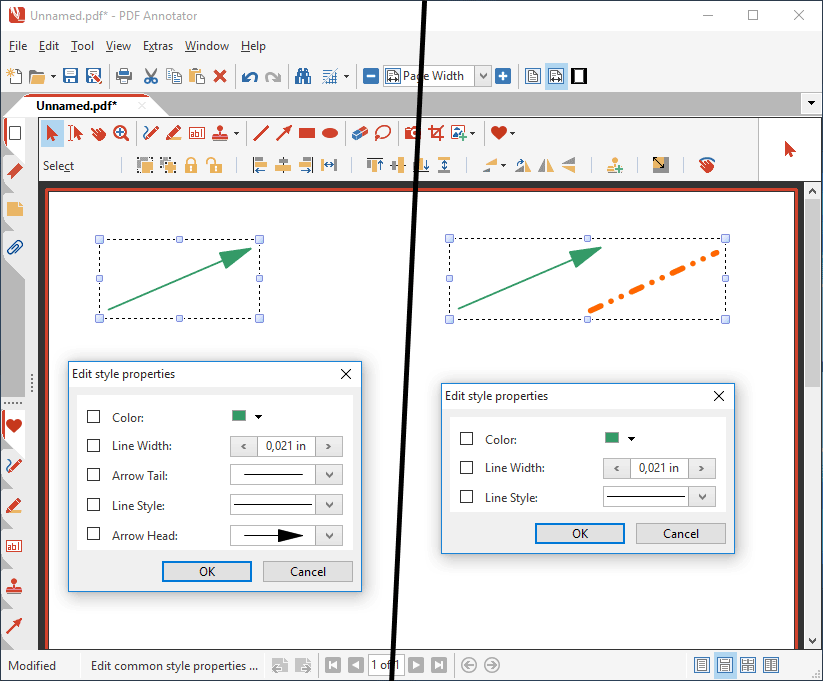
When you select multiple annotations, you will only find those properties listed in the Edit style properties dialog, that the selected annotation types share. In the example above, editing the properties for an arrow markup pulls up all its five properties. A selection of an arrow, and a line markup, though, only pulls up the ones both annotation types share: color, line width and line style.
Selecting Multiple Markup Annotations
You can select and edit several markup annotations simultaneously in the same ways as we discussed in Editing Style Properties in Text Annotations. However, there are three important things to remember when selecting the markups for style editing:
- Selections of like annotations will have all the style options for that group available. For example, when changing the style of arrows, you will have color, line width, arrow tail, line style and arrow head options available.
- When you select dissimilar markups, the only options available will be those that are common to all the selected types. For instance, if you select an arrow with a straight line, only the color, line width and line style will be available.
- If you include a text box in the selection, only the color will be available. This will be the color of the line in the markups and the color of the text in the text box.
Including Stamps When Editing Annotation Markups
Most stamps are images and will not allow any style editing, so it is best not to include them in the selection. However, there are some exceptions:
- Text-based stamps, such as the time and date stamps that come with PDF Annotator, do have style properties that can be edited.
- Some stamps - as the red arrow with "Sign Here" - are in fact groups of images and text annotations, and their properties can only be edited after ungrouping them.
- The proofreading stamps also have editable style properties, such as color and line width.
- If you created a text box and saved it as a custom stamp, the properties will be editable and it can be used with a multiple-selections edit. If you saved objects, such as arrows or lines, in your custom stamp and chose the Insert as group option, the same style editing properties rules apply as in multiple-selections edits. If you want to be able to edit the individual elements of your custom stamp, either ungroup them after you insert the stamp, or edit the properties of the custom stamp in the stamp toolbox.
Two Bonus Tips
I have two bonus tips for you today. One is about using pressure sensitivity and the other concerns drawing lines at specific angles.
Pressure Sensitivity
If you have a pen tablet that allows pressure sensitivity, PDF Annotator can recognize it. If you had the pressure sensitivity icon off for the pen or marker, editing the style will allow you to restore the sensitivity for the selected markups. PDF Annotator remembers how you drew the lines.
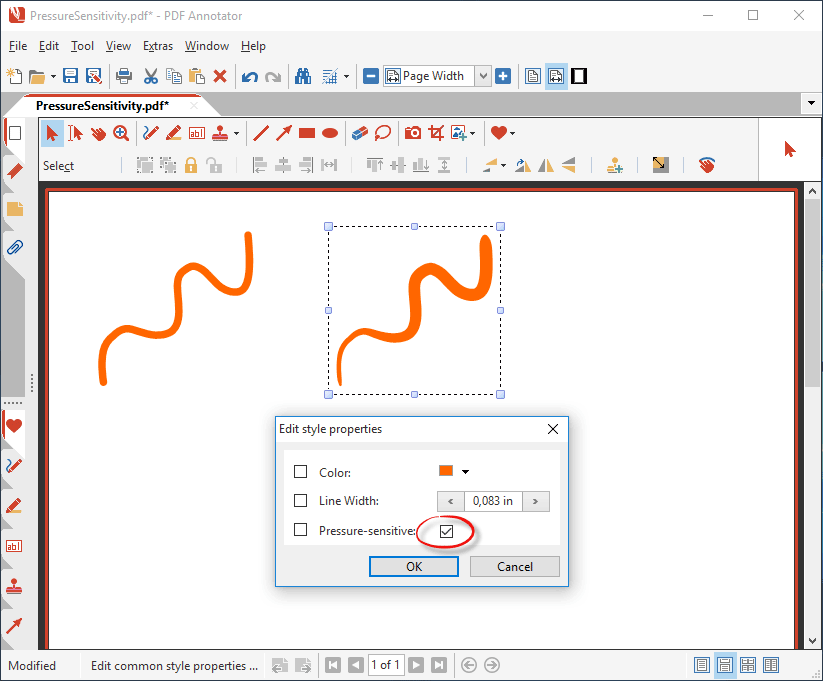
One exception is when you use the auto-smooth feature and draw a straight line. Even when editing the style to include pressure sensitivity, the line will stay the same width.
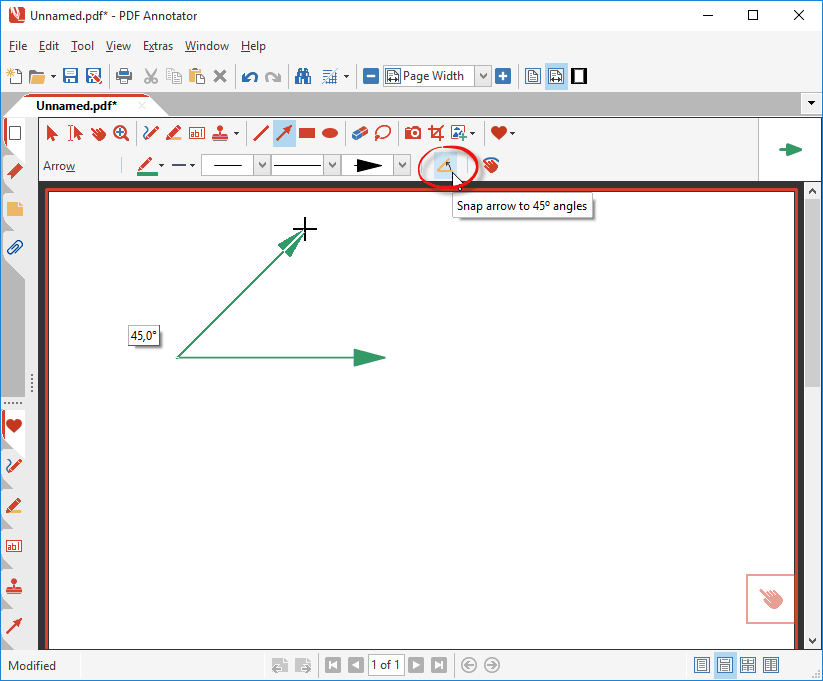
Auto-snap
There is an easy way to make sure your lines and arrows are lined up perfectly horizontal, vertical or at a 45° angle. Turn on this feature by activating the Snap line to 45° angles option. This will force the line or arrow to draw along the correct angle. You can even enforce this behaviour temporarily by keeping the Shift key pressed while drawing.